Modern car engines are complex, with lots of moving parts and intricate engineering. But building a great engine is only part of the challenge for car designers. They also need to figure out how to attach it to the car properly, and that’s where engine mounts play a crucial role. Today, we’ll cover everything about engine mounts, including how to replace them, signs of failure, and more.
What does an engine mount do?
Engine mounts may be small, but they have a big job. Attaching an engine to a car is trickier than it seems. An engine, when running, behaves like a wild animal, wanting to jump and twist around. You might think just bolting it down would solve this, but that creates a new problem: vibrations.
Engines are noisy and vibrate a lot when they work. If you just bolt it directly to the car, all that shaking and noise will be felt inside the car, leading to an uncomfortable ride.
That’s where engine mounts come in. They might come in various types, but they all do the same thing: they act as a cushion between the engine and the car’s body or chassis, reducing those vibrations and noise.
How many types of engine mounting are there?
In the last several years, many different types of motor mounts have been used in cars. However, we can mainly identify three kinds: solid mounts, hydro mounts, and electronic mounts.
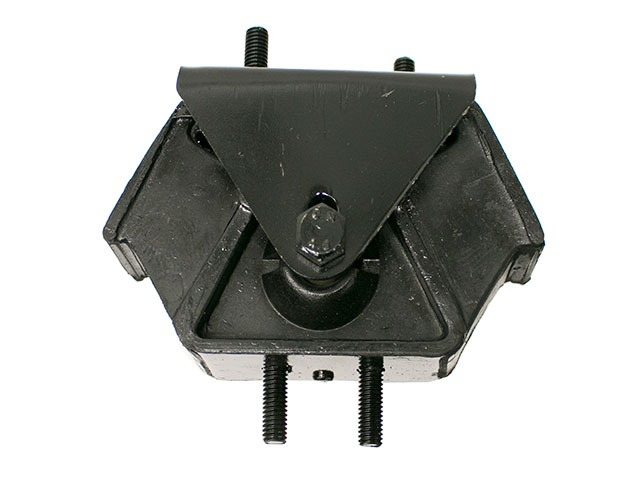
Solid Engine Mounts
Solid mounts are the most widely used and the simplest type of motor mount. They typically have a piece of rubber or a similar material sandwiched between two metal parts. The rubber or another material like polyurethane between the metal can vary in how stiff it is. Some are harder than others, but they all do a good job of absorbing vibrations. This design is also common in many transmission mounts. It’s popular because it’s simple and effective.
The main problem with standard rubber mounts is that they can become brittle over time. When this happens, the rubber might crack, leading to possible mount failure.
Hydro Engine Mounts
For more advanced cars, manufacturers developed hydraulic mounts since standard rubber ones weren’t enough. These mounts are filled with a fluid that absorbs engine vibrations. The fluid is soft yet doesn’t compress, offering both good vibration damping and the necessary stiffness.
However, hydro mounts have a downside: their sealed container can fail after long-term use. When a hydro mount starts to leak, it’s no longer usable. When replacing Hydro Engine Mounts, it’s best to use genuine or OEM (Original Equipment Manufacturer) that are the correct specification for your car.
Electronic Engine Mounts
Electronic mounts represent the latest advancement in this technology. These mounts use active electronic systems to reduce engine vibrations. Some use vacuum systems, while others have different methods of actively dampening vibrations in real-time.
Electronic mounts are crucial in cars with electronic cylinder shut-off systems. These engines have changing vibration and noise levels, so they need a system that can actively counteract these vibrations.
What are the symptoms of a faulty engine mount?
Now that we have an understanding of motor mounts, let’s talk about how to tell if one is going bad. Here are the most common signs of a failing mount:
Bad engine mounts can cause vibration
A clear sign of a bad mount is an increase in vibrations. As the mount starts to fail, it loses its ability to absorb noise and vibrations. Hydro mounts, when they go bad, often have more severe issues compared to regular rubber mounts. Rubber mounts, on the other hand, usually show additional symptoms along with increased vibration.
Bad engine mounts can cause engine movement
Besides reducing vibration and noise, motor mounts also play a crucial role in keeping the motor in place. If engine mounts are failing, they can’t hold the motor securely. This means you might see or feel the engine moving more than usual. To check this, have someone rev the engine while the car is in neutral and watch the engine. If it’s moving a lot, it’s a sign the mounts might be failing.
Clunking Noises and Impacts Felt Inside the Car
If a bad engine mount is ignored for too long, it can completely lose its dampening ability. This leads to the engine making clunking noises and sending shock vibrations into the car’s cabin. Consider this as a last warning sign that the mount needs immediate attention.
Engine Mount Replacement
The engine (motor) mount replacement is usually a simple enough job. We say ‘usually’ because all cars are different in this regard. Some will make your life living hell when you try to change the mount. Either way, here are the universal steps that will work on most cars.
Replacing engine motor mounts involves a few key steps. It’s important to note that the exact process can vary depending on your vehicle’s make and model, we recommend obtaining a Haynes maintenance manual specifically for your vehicle which will provide guidance and torque settings, but here’s a general guideline:
Prepare your vehicle
- Park your car on a flat, stable surface and engage the parking brake.
- Disconnect the battery to ensure safety.
- Gather necessary tools like wrenches, a floor jack, jack stands, and wood blocks.
- Put Jack Stands under the car to protect you when you crawl under it.
Jack up the Engine
First, lift the engine slightly using a floor jack. Place a block of wood between the jack and the oil pan to avoid damage. Be careful not to put too much pressure on the engine mounts, as this can make removing them difficult. Ensure your car is on a level surface and securely positioned before starting.
- Use a floor jack with a block of wood to gently lift the engine. The wood protects the engine from direct contact with the jack.
- Lift just enough to take the weight off the motor mounts without putting too much strain on other components.
Find your Engine Mounts
Identify the motor mounts you need to replace. Your vehicle may have several mounts located at different points around the engine.
Remove Engine-Side Bolts
With the engine supported, find the motor mount you need to remove and take out the bolts connecting the mount to the engine. These bolts are often accessible from above and might require extension tools or a universal joint for your socket wrench to reach.
Remove Body-Side Bolts
Get under the car (make sure it’s safely supported on jack stands) and remove the bolts connecting the engine mount to the car’s frame.
Remove the old Engine Mount
Carefully take out the old engine mount. You might need to slightly adjust the height of the engine with the jack to ease the mount out.
Install the New Engine Mount
Place the new mount where the old one was, making sure it’s facing the right way. Motor mounts typically have guides to prevent incorrect installation. First, put in the bolts that connect the mount to the car’s frame, then lower the engine onto the mount.
Lower the Engine
Gently lower the engine back into place, ensuring the mount is correctly aligned and supporting the engine.
Tighten All Bolts
Once the engine is lowered and everything is aligned, tighten all bolts to the manufacturer’s specifications. If you don’t have specific torque values, tighten them firmly without over-tightening.
Final Checks
Reconnect the battery, remove the jack and stands, and start the engine to check for any unusual noises or movements.